Using an external button to reset the Pico. This idea is so advanced, that Raspberry Pi did not think to include a button on the board.
Components
- 1x 2-pin momentary tactile pushbutton
Instructions
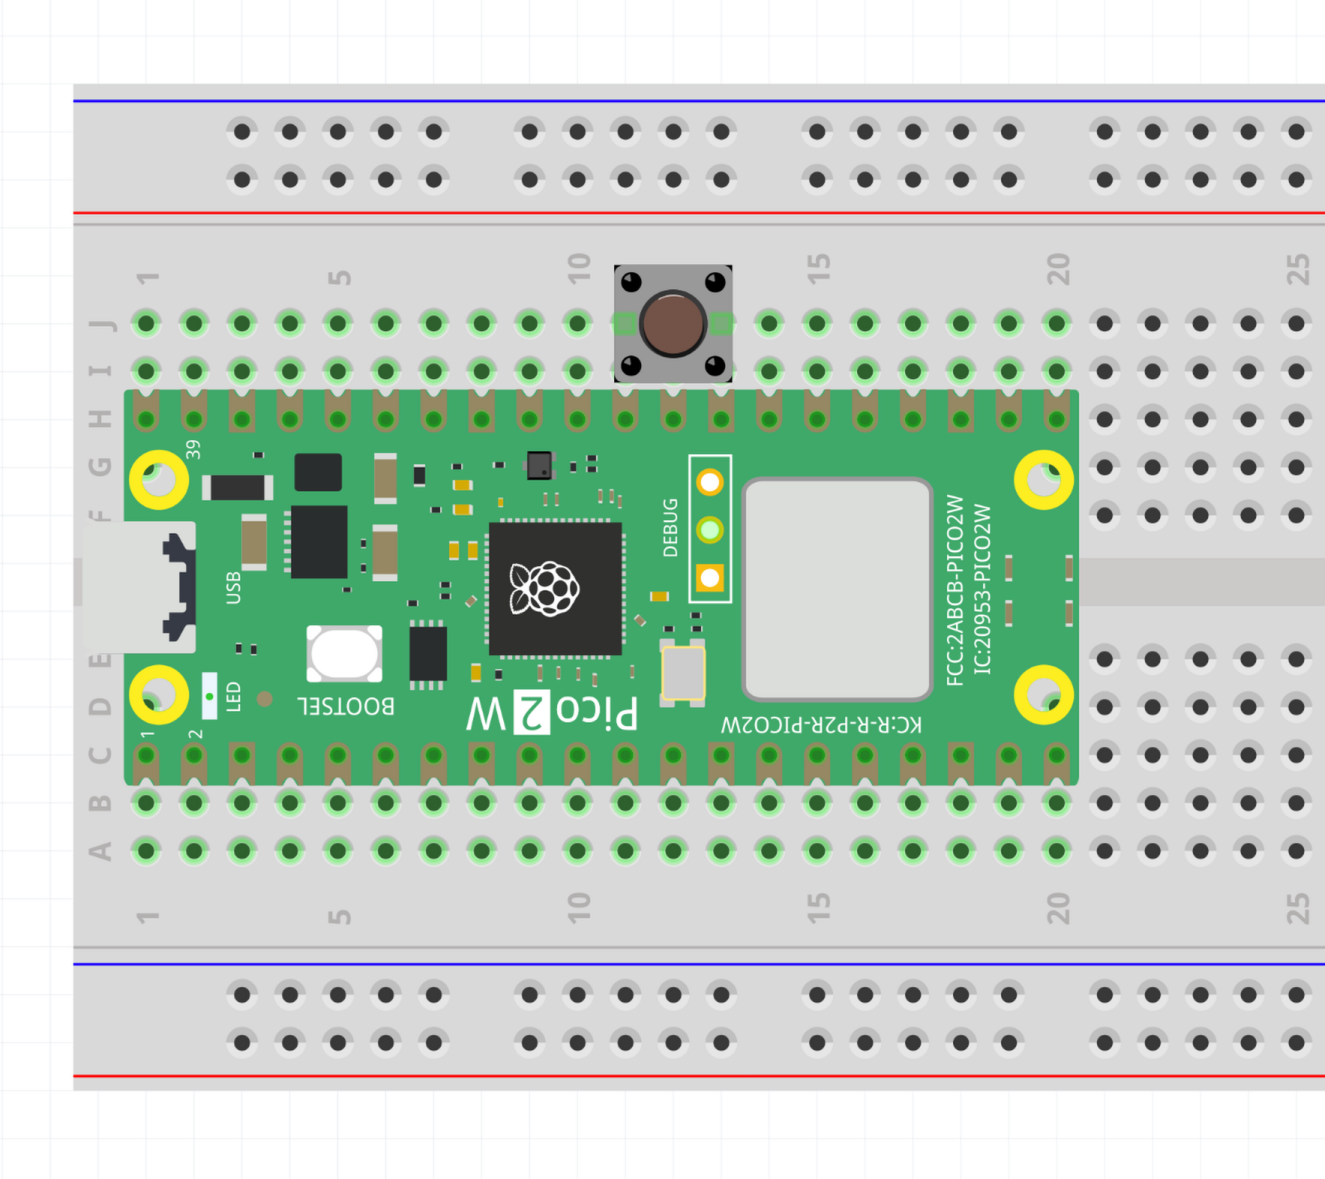
With the Pico inserted into a solderless breadboard, connect the button between pins 30 (RUN) and 28 (GND). (Use the pinout diagram in Raspberry Pi Pico 2 W)
 Breadboard layout to add a reset button.
If you still have the basic LED program loaded, when you press the reset button, the LED will turn off. Once you release the button, the Pico will start up again and the LED will come on.
Explanation
Whenever the RUN pin is connected to GND, the Pico will turn off. The pin has an internal pullup resistor to VCC, so once you break the connection and allow the pin voltage to return to , the Pico will boot up and start running code from the beginning of the program.
Pressing the button is equivalent to disconnecting and reconnecting the USB cable, but much more convenient!
BOOTSEL mode
Now you can enter BOOTSEL mode by following the below sequence:
- Press and hold both the BOOTSEL button and the reset button.
- Release the reset button
- Release the BOOTSEL button.