This is the development environment setup guide for Raspberry Pi Pico 2 W
VSCode (recommended for beginners)
Visual Studio Code is a free, easy to use code editor that runs on all major operating systems.
Installation
Install Visual Studio Code from the website: https://code.visualstudio.com/download
- On Linux, VSCodium needs special launch parameters to work with the Pico extension. The Microsoft version of VSCode works out of the box.
Using Windows and WSL
If you are using Windows, WSL is not necessary. Do not connect to WSL for the following steps.
You may need to install Git on Windows. See below.
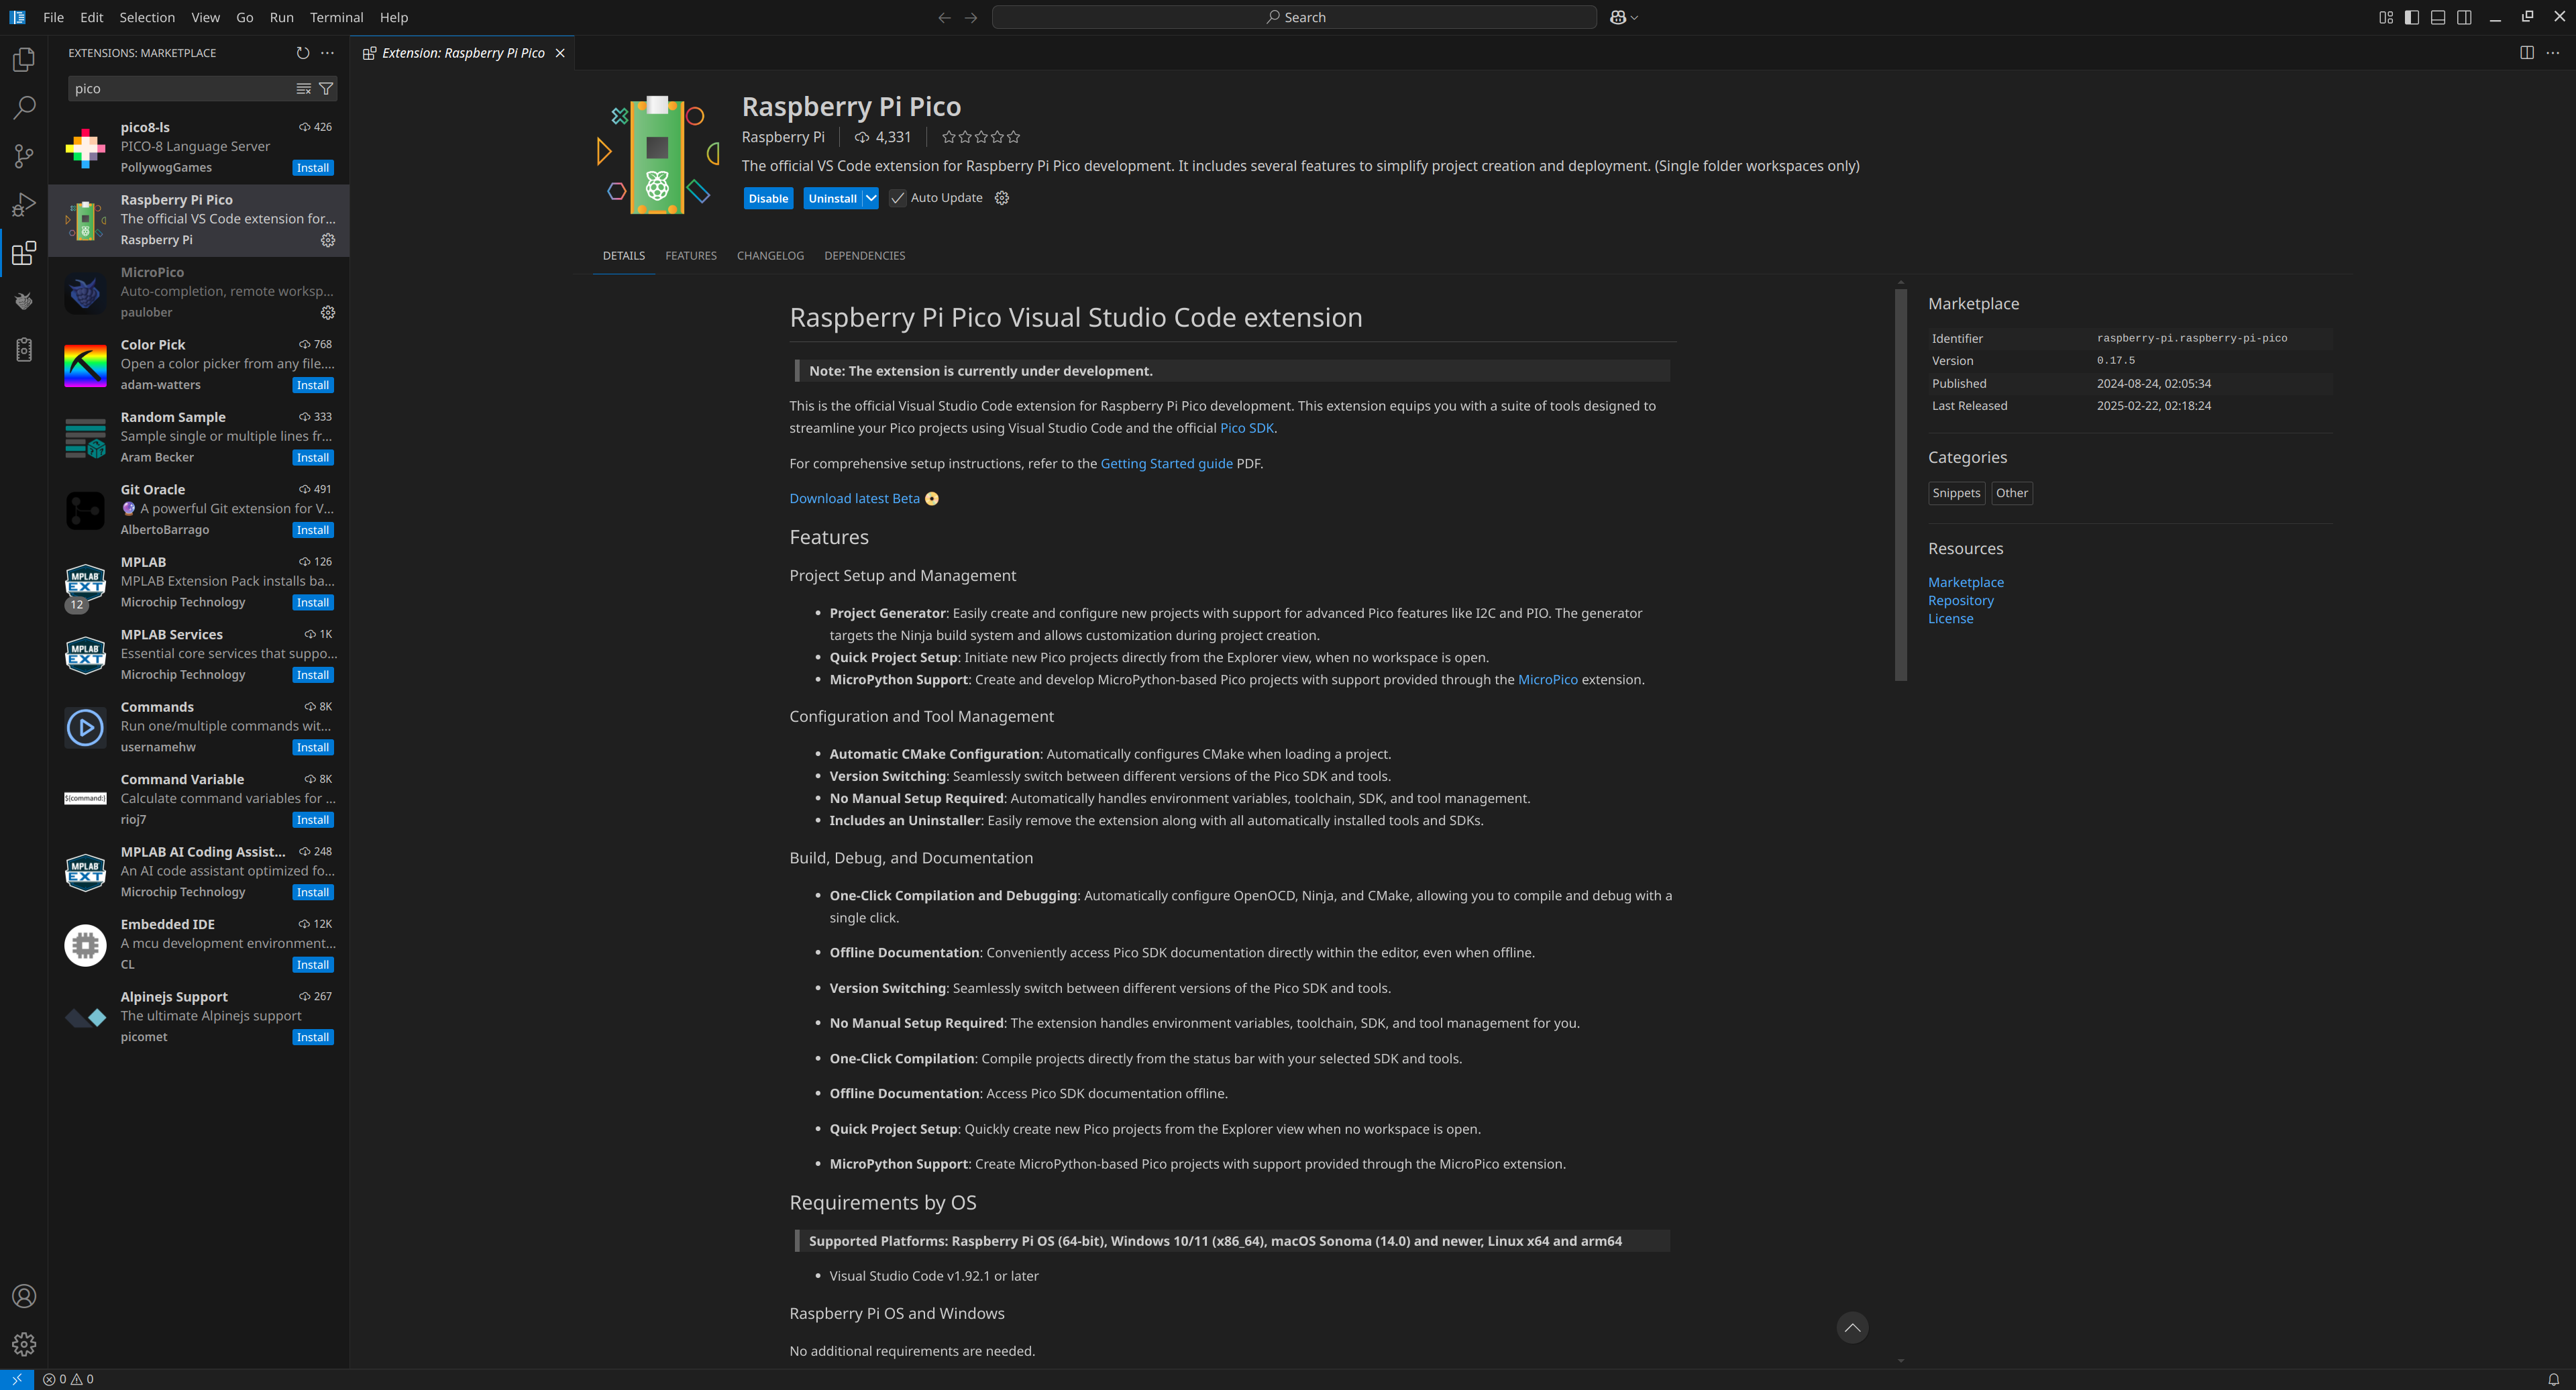
Open VSCode and install the Raspberry Pi Pico Extension.
MicroPython Setup (Recommended for beginners)
Follow this section if you’re going to use Python to code on the Pico. Python is a more beginner-friendly programming language.
Opening the Workshop Repository
The Python code repository is on GitHub
Download this repository to your computer.
- The easiest option is to select Code > Download ZIP from the GitHub Page.
- Or, you can use Git and run
git clone https://github.com/EEESAU/pico-workshop-python.gitin your terminal.
Open the folder in VSCode with File > Open Folder.
Loading MicroPython Firmware
To start off, our Pico does not have any code running on it. To use MicroPython, we need to load a special firmware which contains all the code that it needs to run our Python programs.
Go to the MicroPython download page and download the latest release for Raspberry Pi Pico 2 W (RPI_PICO2_W-yyymmdd-vX.XX.X.uf2)
Pico Firmware
A
uf2file is a firmware for the Pico. It needs to be loaded while the Pico is in BOOTSEL mode. These files are specially built for the Raspberry Pi Pico 2 W, and they won’t run on your computer. To see how they work, we need to load them onto the Pico so it can run them.
BOOTSEL Mode
BOOTSEL (Boot Select) is a special mode that you put the Pico in whenever you want to upload new code.
To put the Pico into BOOTSEL mode:
- Unplug the USB cable. (If you already had it plugged in)
- Hold down the BOOTSEL button.
- Plug the USB cable back in.
- Release the BOOTSEL button.
You should see the Pico appear as a USB storage device on your computer.
To upload new code, drag a
.uf2file onto the Pico storage.
Put the Pico into BOOTSEL mode, then drag and drop the file uf2 file onto it.
Once the file finishes copying, the Pico will disconnect and it will have MicroPython loaded. In VSCode, the Pico should be automatically detected, and you should see ✓ Pico Connected in the bottom left of the screen.
In VSCode, open the blink.py file, then press ▷ Run on the bottom of the screen. The Python code will be uploaded to the Pico, and the green LED will start flashing!
At this point, you’re ready to move on with the rest of the workshop. Go to Basic Programming first.
C SDK Setup
Follow this section if you’re going to use C to code on the Pico.
Opening the Workshop Repository
Look at the code repository for this workshop.
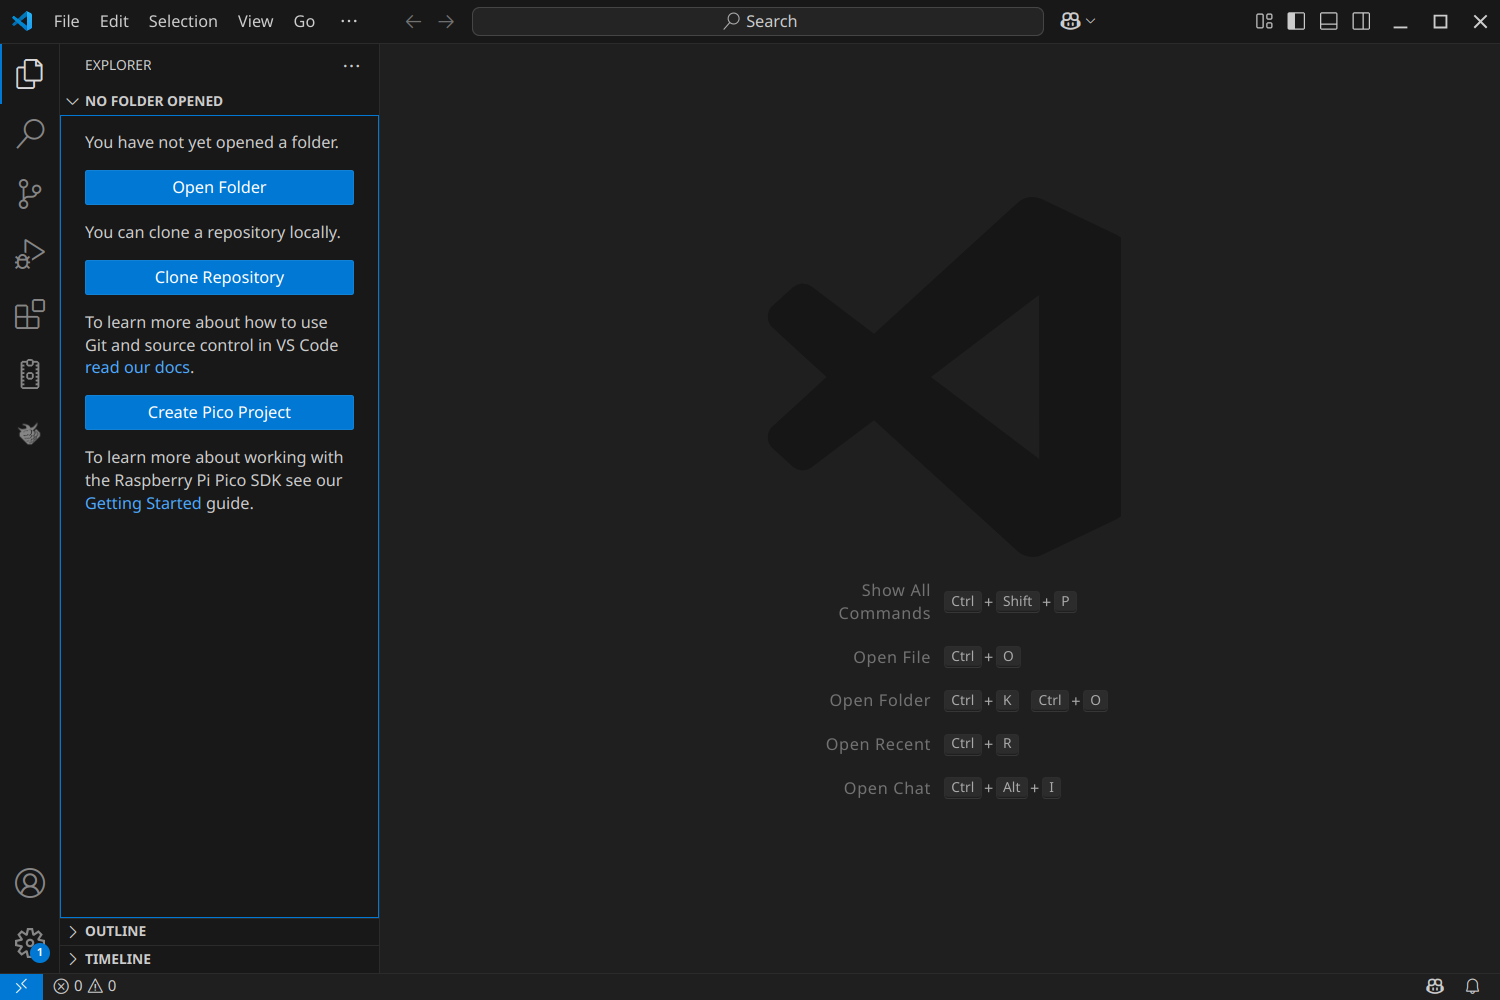
Inside VSCode, go to the File Explorer. Press “Clone Repository” and paste the following URL: https://github.com/EEESAU/pico-workshop.git
- You may need to install Git
Once the project is opened, VSCode will automatically begin downloading the toolchain for Raspberry Pi Pico.
- You might have to say “Yes” to “Do you want to import this project as Raspberry Pi Pico project?”
- View the progress in the notifications at the bottom right.
- This step can take a few minutes as the toolchain is downloaded and installed.
If the setup is stuck or isn't give an option to say "Yes"
In some cases, the setup process can get stuck. In this case, try restarting VSCode and reopening the project.
Expect to wait up to 15 minutes for the toolchain to download.
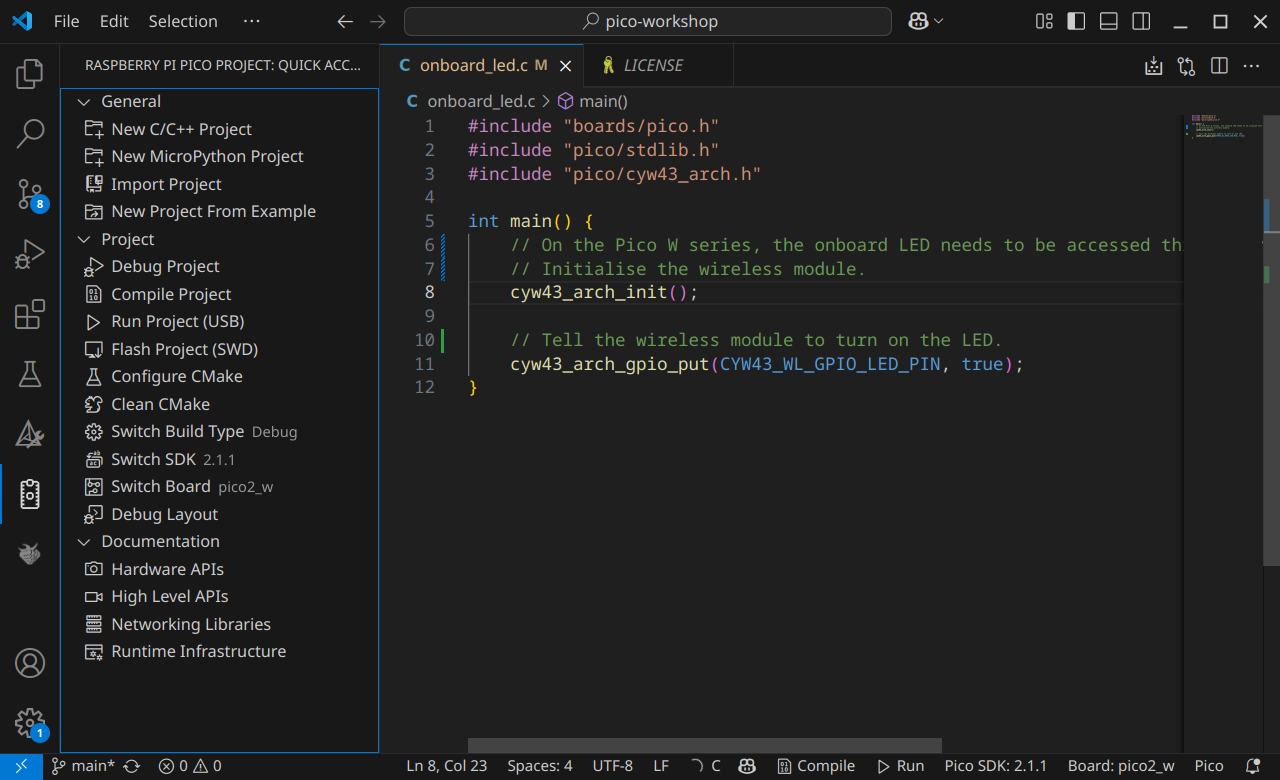
Ensure you have the following settings set:
- SDK:
2.1.1 - Board:
pico2_w
Uploading code to the Pico
Once the toolchain is finished downloading, VSCode will open the new project.
Open the file led_tester.c in the root directory.
- This is a short program that turns on an LED built onto the Raspberry Pi Pico 2 W.
To compile the code, choose Compile Project from the sidebar menu.
Once the compilation is finished, the executable files will be inside the build folder.
These files are specially built for the Raspberry Pi Pico 2 W, and they won’t run on your computer. To see how they work, we need to load them onto the Pico so it can run them.
BOOTSEL Mode
BOOTSEL (Boot Select) is a special mode that you put the Pico in whenever you want to upload new code.
To put the Pico into BOOTSEL mode:
- Unplug the USB cable. (If you already had it plugged in)
- Hold down the BOOTSEL button.
- Plug the USB cable back in.
- Release the BOOTSEL button.
You should see the Pico appear as a USB storage device on your computer.
To upload new code, drag a
.uf2file onto the Pico storage.
Put the Pico into BOOTSEL mode, then drag and drop the file build/led-tester.uf2 onto it.
Once the file finishes copying, the Pico will disconnect and the green light will turn on. It just ran our code!
At this point, you’re ready to move on with the rest of the workshop. Go to Basic Programming first.
Manual C SDK Setup (If you don’t want to use VSCode)
Follow these steps to setup your C toolchain without using VSCode.
Install the following tools:
- ARM bare-metal Embedded ABI compiler
arm-none-eabi-gccarm-none-eabi-binutilsarm-none-eabi-newlib
- CMake
- Python
Clone the repository:
git clone https://github.com/EEESAU/pico-workshop.git
cd pico-workshop
Run CMake
- We need to set an environment variable to enable the SDK to be automatically downloaded.
export PICO_SDK_FETCH_FROM_GIT=1
cmake -S ./ -B ./build -DPICO_BOARD=pico2_w -D
Compile the onboard_led program
cd build
make onboard_led
Follow the steps above to put the Pico into BOOTSEL mode and upload the led-tester.uf2 executable